How to write your EC2 SQL Server Backups to Amazon S3
 This post specifically discusses how to write your EC2 SQL Server Backups to Amazon S3. It should not be confused with running SQL Server on RDS which is Amazon’s managed database service. To back up to S3, you will need to have an AWS account and a bucket in S3 that you want to write to. You’ll also need a way of authenticating into S3 such as an access key or IAM roles.
Background
Recently, I have been investigating running SQL Server in Amazon EC2. One issue to resolve is where to store database backups. Amazon S3 is far cheaper and has much higher redundancy than Amazon EBS (Elastic Block Store) so storing the backups here is an attractive idea. Furthermore, we can use rules in S3 to auto delete old backups or move them to Glacier which is cheaper than S3 Standard. However, there is no obvious or inbuilt way to write your EC2 SQL Server Backups to Amazon S3 directly.
Example Costs as of December 2017 (US-EAST-1 Region) for storing each Terabyte of backup.
| EBS – General purpose SSD | Amazon S3 | Amazon Glacier |
| $1228.80 | $282.62 | $49.15 |
Why is this a problem? (Block storage vs object storage)
SQL Server expects to be able to write backups to a file location (block storage) but S3 is Object Storage. This makes S3 unsuitable for direct backups. Newer versions of SQL Server (2016 onwards) also allow a BACKUP DATABASE TO URL option but this is designed for Microsoft Azure Blob Storage and as such, an S3 bucket cannot be used as the URL.
As such, we need a method to get the file into S3, either directly or indirectly because the storage cost is so much cheaper than EBS. Amazon recommend using File Gateway but this involves running another EC2 machine. This isn’t cost effective or easy to implement so I’ve discarded this method for now. The two options which I have tried and tested are below, they both have their pros and cons. I’ve also listed 3 other methods which may help you write your EC2 SQL Server Backups to Amazon S3 directly but these are untested by me as I rejected the approach.
A note on Ola
The Ola Hallengren backup solution (link) works well in EC2 when writing to EBS storage as this is just treated like a local drive. It also works well if writing to Azure Blob Storage. Whilst it also works with 3rd party backup tools such as LiteSpeed, it doesn’t cater for the latest LiteSpeed functionality that does allow writes directly to S3. I have written to Ola to ask if this is something that could be considered for a future release but until then, I am unable to use Ola’s solution.
Option 1 – Write to EBS and Sync with S3
Take a database backup using t-sql. Better still, schedule a job via SQL Agent to run at a set interval.
BACKUP DATABASE [Test]
TO DISK = N'D:\MSSQL\BACKUP\Test.bak' WITH NOFORMAT,
NOINIT,
NAME = N'Test-Full Database Backup',
SKIP,
NOREWIND,
NOUNLOAD,
STATS = 10
Using the AWS command line, copy the backup from your EBS volume to your S3 bucket. This should be step 2 of your agent job.
aws s3 sync D:\MSSQL\BACKUP s3://sqlpoc-backups/prod-backupsDelete the backup on EBS so the space will be available for the next backup. I have used PowerShell to do this but you can choose any method you prefer. This should be step 3 of your agent job.
remove-item D:\MSSQL\BACKUP\* -Recurse
Note: When sizing your EBS volume, it needs to be at least the size of your biggest database backup (with some room for growth). If this is the size you choose, bear in mind you can only back up one database at a time. If you size the drive bigger, you can back up more databases in the same job before syncing with S3 however this will be more expensive. With EBS, you pay for the size of the volume allocated, not just what is used. This is different to S3 where you only pay for data stored.
Option 2 – Write directly using LiteSpeed
Quest LiteSpeed is a 3rd party product for backing up SQL Databases. One very useful feature of enterprise edition is that it allows you to backup directly to Amazon S3. This is huge because it takes away the need for any intermediate storage, VMs or other services. It pushes your backup directly to the desired bucket location in S3. To do this, you’ll need to add a few new parameters to your backup calls but overall, it’s saves a load of hassle.
Note: This isn’t an ad for LiteSpeed, my decision to use it is down to my company already having a license agreement with Quest. If I didn’t have this in place, I would more than likely go with option 1, ultimately cost would be the deciding factor unless the difference was small.
Before writing your t-sql for the backup job, you will need to add your cloud account details to the LiteSpeed desktop app. Here you will need to pass in your Cloud Vendor, Display name, AWS Access Key, AWS Secret Key, region, storage class and bucket name.
exec master.dbo.xp_backup_database
@database = N'Test',
@backupname = N'Test - Full Database Backup',
@desc = N'Full Backup of Test on %Y-%m-%d %I:%M:%S %p',
@compressionlevel = 7,
@filename = 'test-backups/Test-Full.bkp', -- folder name within bucket defined here
@CloudVendor = N'AmazonS3',
@CloudBucketName = N' sqlpoc-backups',
@CloudAccessKeyEnc = N'xxxxxxxxxxxx’, -- an encrypted version of your access key (generated by LiteSpeed app)
@CloudSecretKeyEnc = N' xxxxxxxxxxxx, -- an encrypted version of your secret key (generated by LiteSpeed app)
@CloudRegionName = N'us-east-1',
@UseSSL = 1,
@OLRMAP = 1 ,
@init = 1,
@with = N'STATS = 10',
@verify = 1
As Amazon S3 is object storage, it does not support appending to an existing file so if using the same name each time for your backups, the previous backup is deleted and replaced. If you turn on versioning in your S3 bucket, you can keep old versions of the same filename. Or if each backup has a unique name (due to time stamp being appended), it will save them side by side. Do remember to have Object Lifecycle Rules turned on for all or specific items in your bucket to either delete old backups or send them to the much cheaper Glacier storage tier. If you don’t, your bucket size will grow very quickly and costs will escalate.
Option 3 – Map s3 bucket as a drive
If only this was easy. Doing this natively is not possible as far as I can tell. This comes down to a difference in storage types. S3 is object storage and for a drive, we need block storage. That said, there a number of 3rd party solution which I have not tested that seem to offer this service. A quick google suggests CloudBerry and Tntdrive as the most popular providers.
Option 4 – File Gateway/Storage Gateway
When investigating methods for saving my backups to S3, AWS support recommended using File Gateway. This would certainly overcome the technical challenge of getting the files into object storage (S3) as it allows you to mount an NFS Volume, but it adds complexity and cost to the process. File gateway is very useful as a method of connecting an on-premises appliance to cloud based storage however as the instances were already in the cloud (EC2), I didn’t feel like this was a very satisfactory solution.
Option 5 – Other 3rd Party tools
Other 3rd party tools exist such as CloudBerry which allow but I have not looked into them in detail. Prices start around $150 per server but they do offer volume discounts.
Useful references
https://docs.microsoft.com/en-us/sql/relational-databases/backup-restore/sql-server-backup-to-url
https://support.quest.com/technical-documents/litespeed-for-sql-server/8.6/user-guide/8
How do you write your EC2 SQL Server Backups to Amazon S3?
If you use another method listed not here, I’d be delighted to hear about it in the comments.
 I had the pleasure of speaking at last night’s SQL Server Meetup in Glasgow. It was a fairly relaxed affair and I hope that the session was enjoyed by those who attended.
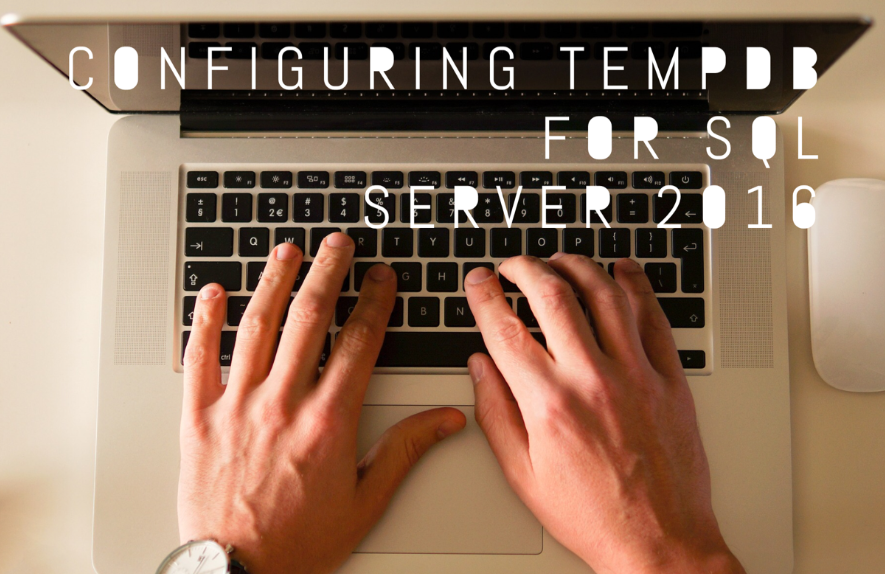 As I troubleshoot performance problems with SQL Server, I often find that the configuration of the TempDB system database can be a cause, or a major contributor to poor performance. It is amongst the most prolific offenders and is an easy fix. In previous versions of SQL Server, TempDB was a bit of an afterthought when it came to installation however with SQL Server 2016, you can set it up the way you want from the outset, albeit with some minor restrictions.
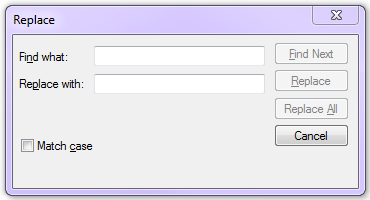 I had the situation recently where I needed to search and replace a string inside an SSIS package. The reason for this was about 25 Execute SQL tasks within the package all included some hard coded T-SQL that pointed at a decommissioned network share. I needed to change the T-SQL in each task to point to a new network share. I know the package should have used a variable for this but I needed a quick fix.
 Error DReplay Could not find any resources appropriate for the specified culture or the neutral culture